Thursday, May 24, 2007

Stage 6: Insert Architectural Objects


3D Studio Max has a feature that allows you to add ready made doors and windows. This feature was very useful as it made the process of this stage a lot quicker. As I had many doors and windows I decided to create templates, add textures to them and then clone them into the appropriate place on the model. This saved a lot of time as i didn't have to add textures to each object individually. Once again I used the elevations to estimate the size of the of the windows and the doors.

VR Stage 5: Model Proposed Extension

Modelling the proposed extension was very quick and simple as I already had half of it done with the existing house. I just needed to add the extra walls, delete any doors and windows that would be demolished and boolean spaces for new windows and doors.

VR Stage 4: Stairs


I created the stairs by cloning 3D boxes and placing them on top of eachother. There is a feature on the software which you can use to automatically create stairs, however I needed the stairs to be a particular height, length and width and found it easier to make them manually. As I didn't have exact measurements it took me a few times to get the stairs the right size. It was simple to align them as I already had the the 2D drawings as a guideline.


VR Stage 3: Boolean Windows & Doors


To insert spaces for the windows and doors I started off by creating 3D boxes that were slightly bigger in depth than the walls. I then positioned them all on the model using the drwings as a guide to where the windows and doors are. Before I applied the bollean tool I added segments to all the walls. This made sure the structure was stable as when meshes are edited too much the model would collapse. Below is a screenshot of what the model looked like after the boolean tool had been applied.


VR Stage 2: Extrude 2D Splines

I extruded the 2D splines to create the main structure of my house in 3D. I decided to model the existing house first and then use it as a basis create the proposed instead of modelling them both twice. I did not have measurements for the height of the house and therefore used the elevations as a guideline to estimate it. I kept the 2D drawings in the scene and positioned them on the model. This was useful for the placement of the doors and windows.

VR Stage 1: Trace 2D Drawings


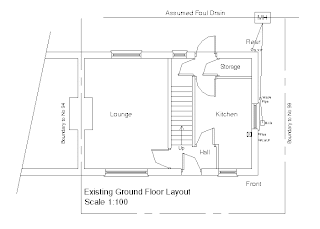
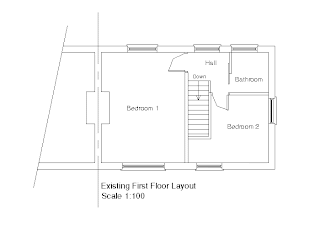
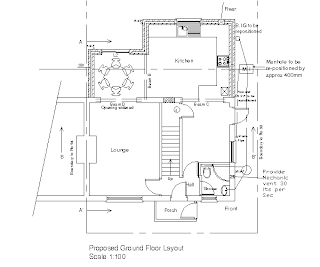
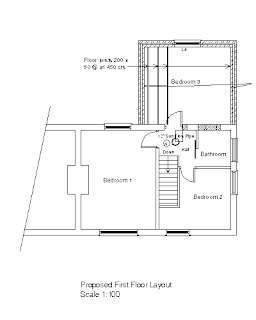
The first stage of the project involved importing the2D AutoCAD drawings into 3D Studio Max. I used these as a guideline to trace the main walls in the existing and proposed drawings for the ground floor and the first floor. At first I traced the walls as they were on the plans leaving gaps for the doors. However I realised that all spaces for the doors and windows would be inserted using the boolean tool. If the space for the door had been left from before then there would be no wall above it when the actual door was inserted. I feel these initial foundations of the project (walls and floor) were very accurate.

Virtual Environments - Project Planning

Before I started modelling the house I felt it was important to plan what I was going to do on paper. This would break down the stages and would ensure I didn't forget to model anything. The following were the main stages that I would go through:

* Import CAD Drawings
* Trace
* Extrude Add details: Windows/Doors/Furniture
* Textures
* Lighting
* Other Details
* Model Extention Animation or Create VRML

Virtual Environments - Project 2

Introduction

For this project we were set the following brief:

Design, model and present a virtual environment based on an industry that you think will benefit by using 3D modelling, to convey a message or an idea, i.e. architecture, town planning or internet chat room etc.

From this I wrote the following individual brief:

Design and model a virtual environment for 96 Surrey Street and its proposed extension. Present research and reasons on how you think 3D and Architectural Modelling will benefit the industry of Residential Property Development and its consumers.


My project aims and objectives were:

• To create a 3D model of the existing property
• To create a 3D model of the proposed extension
• To combine the existing and proposed 3D model to create a VRML walkthrough of the property or an animation of the extension
• Effectively demonstrate what the property looks like now and what it will look like after the extension